Thursday, December 17, 2015

Gingerbread Balls

Yup, you heard me right. :)

When I found these little suckers, they totally peaked my interest. I LOVE Christmas cookies, especially gingerbread!! What a surprisingly delicious way to enjoy the spiced flavor of gingerbread cookies without the guilt! With only 58 calories per serving, these treats will satisfy your sweet tooth and keep you off Santa’s naughty list.

Gingerbread Balls
Total Time: 15 min.
Prep Time: 15 min.
Cooking Time: None
Yield: about 18 servings, 1 ball each
Ingredients:
¼ cup almond flour
¾ cup dry old-fashioned rolled oats, gluten-free
1 scoop Vanilla protein powder of your choice (I use Shakeology)
1 tsp. ground cinnamon
½ tsp. ground ginger
¼ tsp. ground cloves
1¼ cups pitted dates, packed
Preparation:
1. Place almond flour, oats, protein powder, cinnamon, ginger, and cloves in a food processor; pulse until mixture is the consistency of flour.
2. Add half of dates; pulse until well blended.
3. Add remaining dates; pulse until mixture forms a uniform dough.
4. Shape dough into eighteen walnut-sized balls; place in airtight container.
5. Refrigerate for at least 1 hour before serving.

Thursday, December 10, 2015

Cut Your Workout Time in HALF

I found this article on the Team Beachbody Blog, and I LOVE the practical tips offered here. Who DOESN'T want to cut their workout time in half? We're all crazy busy, and fitting in a good sweat sesh can be challenging at times. Why not make your time as efficient as possible?
"Getting your daily dose of exercise used to be easy (at least by American Heart Association standards): Just walk briskly for a half hour. Thirty minutes of moderate-intensity activity a day was all you needed to slash your risk of heart failure and improve overall health and wellness. But a new report in the journal Circulation reveals that the AHA’s guidelines fall way short of the actual amount of exercise required to reap those benefits. The new recommendation: One to two hours a day.

The report — a meta-analysis of 12 studies that followed 370,460 men and women who recorded their daily activities — correlated exercise duration with long-term heart health. The finding: While participants who followed the AHA’s guidelines experienced a “modest” (10 percent) reduction in the risk of heart failure, those who exercised for twice and four times as long (60 and 120 minutes), experienced a 20 percent and 35 percent reduction, respectively.
Does that mean you should double, triple, or quadruple your exercise time? Not if you know this workaround: Amp up the intensity of your workouts. One minute of vigorous activity (think: running, playing basketball, cycling uphill, or doing a metabolic training program like INSANITY) equals two minutes of moderate intensity activity (walking, riding a bike leisurely, pushing a lawnmower), according to the Centers for Disease Control. In short, by sweating harder, you can cut your workout time in half, finishing each sweat session in 30 minutes or less.
How hard is hard enough? If you find holding a conversation difficult, you’ve nailed it. But you should never finish a workout feeling drained. Your goal is always to walk away feeling energized, not spent and defeated.
Now for the caveat: Don’t stop walking. You don’t have to carve out time to walk laps around your office building, but spreading short bouts of moderate intensity activity throughout your day will ultimately add up to greater mobility, more energy and stamina, and less fat and fatigue."
What do you think? Doable? 


Friday, December 4, 2015

Gingerbread Protein Pancakes... YUM!

I came across this recipe this morning, and I wanted to share... these are DEFINITELY making my weekend brunch menu!! Enjoy!!


Total Time: 20 min.
Prep Time: 5 min.
Cooking Time: 15 min.
Yield: Makes 3 servings, 2 pancakes each

Ingredients:

1 tsp. ground cinnamon
1 tsp. ground ginger
1 pinch ground cloves
1 pinch ground nutmeg
1 scoop whey protein powder, vanilla flavor, or equivalent (or Beachbody Base Shake)
⅓ cup reduced fat (1%) plain Greek yogurt
4 large egg whites (½ cup)
¼ cup old-fashioned rolled oats
2 Tbsp. coconut flour
1 tsp. spice mix (see below)
½ tsp. baking powder
2 tsp. molasses (Blackstrap if possible)
Nonstick cooking spray
¼ medium pear, cut into bite-sized chunks (optional)

Preparation:

1. To make spice mix, combine cinnamon, ginger, cloves, and nutmeg in a small bowl; mix well. Set aside.
2. Combine protein powder, yogurt, egg whites, oats, coconut flour, 1 tsp. spice mix, baking powder, and molasses in a medium bowl; mix well.
3. Heat large nonstick skillet lightly coated with spray over medium heat.
4. Ladle about ¼ cup batter for each pancake; cook for 2 to 3 minutes, or until bubbles form on top. Flip. Cook for 1 to 2 minutes, or until golden brown and cooked through.
5. Repeat until all batter is used.
6. Serve two pancakes topped with pear, if desired; serve immediately.

Tuesday, October 20, 2015

Little Debbie Makes a Comeback! Paleo Oatmeal Creme Pies... Mmmmm....

This delicious find came from the Unrefined Kitchen, so I definitely can't take credit for it. But seriously. When you can take a favorite childhood treat and turn it into a healthy snack, I'm all aboard!

“Oatmeal Creme” Pies (these are grain-free, egg-free, dairy-free and no refined sugars!)
Cookie Ingredients:
  • 1 cup creamy almond butter
  • 1/3 cup raw honey
  • 2 tsp. vanilla extract
  • 3 Tbsp. water
  • 1 Tbsp. ground chia seeds
  • 1 1/2-2 tsp. cinnamon
  • 1/8 tsp. nutmeg
  • 1/2 tsp. salt
  • 1/2 tsp. baking soda
  • 1/2 cup shredded unsweetened coconut
  • 1/2 cup raisins
Cookie Directions:
1. Preheat oven to 350 degrees.
2. Mix all the cookie ingredients together in a large bowl. Allow to set a few minutes so that the chia will bind the batter.
3. Line a cookie sheet with parchment paper. Drop spoonfuls of dough unto the the paper.
4. Remove cookies from oven and press down gently with a small piece of parchment paper to flatten.
5. Cool completely.
Marshmallow Creme Ingredients:
  • 1 cup water (split in half)
  • 1 cup raw honey (
  • 1 Tbsp. gelatin 
  • 1 tsp. vanilla extract
  • pinch of salt

Marshmallow Creme Directions:
1. Put 1/2 cup water and gelatin in a large bowl. Set aside.
2. Put the other 1/2 cup water, honey, vanilla and salt in a medium saucepan and cook over medium heat.
3. When the mixture begins to boil.
4. Remove mixture from stove and slowly pour into bowl with gelatin. Mix vigorously with wire whisk
5. Mix until the mixture becomes thick like marshmallow creme. (This could take up to 10 minutes.)
6. Spread creme on bottom-side of a cookie as thick as you like. Top it off with another cookie to make a “sandwich”. Enjoy!

Wednesday, October 14, 2015

Trick your Palate... with some BAKED COCONUT SHRIMP!!

Nothing makes my mouth water more than some deliciously crunchy coconut shrimp... but the calories and fat in a big 'ole batch of fried goodness just negated every calorie I burned in Insanity class this morning! So here's a great way to still get that satisfyingly sweet taste, keep all the nutrients in tact, and NOT undo your entire day...

INGREDIENTS
Nonstick cooking spray
1/2 cup flaked unsweetened coconut
6 tablespoons plain panko breadcrumbs
3 tablespoons whole wheat flour
2 large egg whites
1 pound large shrimp, peeled, deveined, and patted dry
Salt and fresh pepper
For dipping sauce:
1/4 cup low-fat Greek yogurt
2 tablespoons lime juice
1 tablespoon ancho chili powder

DIRECTIONS
1. Preheat the oven to 450°F. Spray a baking sheet with nonstick spray.
2. To make the dipping sauce, combine all Greek yogurt, lime juice, and chili powder in a small bowl. Set aside in the refrigerator.
3. Combine the coconut, panko, and flour in a bowl or baking dish.
4. Beat the egg whites in a medium bowl until slightly frothy.
5. Season the shrimp with salt and pepper.
6. Add the shrimp to the egg whites; toss to coat. Lift each shrimp from the egg whites, letting the excess drip off the shrimp. Coat in the crumb mixture, pressing to adhere.
7. Place the shrimp on the baking sheet in a single layer. Lightly spray with nonstick spray.
8. Bake until the shrimp are golden on the outside and opaque in the center, 8 to 10 minutes. Serve with the dipping sauce.

Enjoy, my friends!
xoxo,
Alison

Wednesday, September 30, 2015

How to Get the MOST from your Workout (and you DON'T need a personal trainer!)

Here's a question I get A LOT... How do you push yourself to your max so you get results... especially when it's so easy to press that pause button? No one would know, right?!

While that may be true, pressing that pause button or lifting a little lighter today because you've had one tough day at work isn't doing you any favors. Quite honestly? Results are embedded in what you choose to do when you're tired. Think about those moments when your brain is telling you to stop because you're uncomfortable. Do you listen? Or do you push through it? If you choose the latter, THAT'S when you'll see those results. The stubborn belly fat starts to disappear. The last few pounds melt off. Those abs/biceps/quads start popping.

Here are some tips that can help you in the war between your body and your brain:

1. Have a goal, and post it where you can see it during your workouts (and maybe even in your kitchen as well). Why? Not only are you giving yourself accountability, but you are visualizing your WHY when the going gets tough. You are giving this workout/meal/MOMENT purpose. Envision that goal, and how it will feel once you've accomplished it!

2. Reverse engineer that badboy. Goals are great, but you've got to have a plan of execution. Otherwise, your goal is just a wish. What are you going to do first? Second? What happens after you've reached your goal? Do you stop? Part of what I do as a coach is help people make those plans, and keep them accountable throughout the journey.

3. Keep it interesting. You need to switch up your routine every now and then. Not only for your mind, but for your body, too. Your brain loves routine. In fact, your body will adapt to the same movements pretty quickly. It's called muscle memory. Challenge yourself to go faster, jump higher, lift heavier. Try different workouts. Make it a game.

4. Don't forget about the food. Fueling your body with the nutrients it needs to perform at it's peak during these workouts is CLUTCH. You want to make sure you aren't setting yourself up to fail! What you put in your body can literally make or break your results. Need a little pick me up? Get a great pre-workout to give you some extra go-juice. I have a few recommendations that I love. Feel free to email me or comment if you're interested in my opinion! Nutrition is literally 75-80% of the battle.

Keep those eyes on the prize, my friends! I'm here for motivation and accountability if you need it. I run accountability groups all the time, and they are a blast. If you find yourself needing that extra little nudge (or push :) ), I'm here for you.

xoxo,
Alison

Thursday, September 24, 2015

Crockpot Creation... HEALTHY QUINOA CHICKEN CURRY BOWLS

So I've been on the hunt for some healthy crockpot recipes now that we're getting into fall, and I came across this one from blogger "Pinch of Yum." I'm planning on putting this in next week's dinner rotation to see if it passes the ultimate test... getting husband approval! :D

HEALTHY QUINOA CHICKEN CURRY BOWLS
Serves: 6


INGREDIENTS:
1 tablespoons olive oil
1 cup diced onions
1 lbs. boneless skinless chicken thighs (breasts are also good)
2 tablespoons curry paste
2 teaspoons garam masala (cumin or roasted coriander are also good)
1 tablespoon ginger paste
3 cloves garlic
2 cups tomato puree
2 cups chicken broth
3 cups diced eggplant (peel removed)
3 cups diced fresh tomatoes
1 cup uncooked quinoa
toppings: crushed almonds, rice, noodles, cilantro, green onions, almond butter


INSTRUCTIONS
Dump everything in the slow cooker and cook on high for 4 hours or low for 6-8. Delicious!

Enjoy, and share with a friend! :)
xoxo,
Alison

Wednesday, September 16, 2015

A Spoon in one Hand, and a Jar of Peanut Butter in the Other... Sound Familiar?

I don't know about you, but I have definitely been THAT girl. You know, the one who stands in front of the pantry in the kitchen with a giant spoon and a jar full of Jiff just going to town like a ravenous she-wolf. #thestruggleisreal.

So why do we "fit chicks" (or aspiring fit chicks, I should say) crave peanut butter so badly? I did a little research into this, because seriously... it's a thing! So here's what I found out...

You're craving those spoonfuls of delicious peanut butter because:

1. Your eating plan is low in carbohydrates. I've experienced this scenario first-hand. When I was doing the 21 Day Fix Extreme "Countdown to Competition" eating plan (which is AMAZING for getting primed for a special event, by the way... crazy results!), there were days cycled in that only allowed for 1 carbohydrate portion. This wasn't every day, but it was usually 2 days back-to-back, with a regular 21DFX eating day (with more carbs involved) in between. It was almost like the less carbs I ate that day, the better the peanut butter tasted. Right? Have you experienced that? Moral of the story? Whenever there is ANY kind of imbalance in your diet whatsoever... be it not enough carbs, not enough fat, etc... there will be weird cravings.

2. Your eating plan is extremely low in fat. Word to the wise... FAT IS NOT THE ENEMY! In fact, a proportionate amount of healthy fats can help you LOSE weight and stay healthy. Think of your body as a well-oiled machine... you need the oil! With that said, not all fats are created equal. Make sure you're not pounding sticks of butter, and you'll be ok. You want to stick to things like avocado, natural nuts (almonds, cashews, etc), coconut or olive oil, and yes... you said it... PEANUT BUTTER! Nut butters are GREAT in moderation. If you're on a low fat diet and you are craving PB like a mutha, guess what... you should eat it! Try adding in more healthy fats to your diet, and those cravings should become less severe.

3. You're stressed! You can be stressed from a variety of things... work, traffic, your kids/spouse/boss/mom/sister... or maybe you aren't getting enough sleep, or you were so busy you had to skip lunch that day. Wherever the stress-er lies, know this: our bodies tend to crave foods that are high in fat and calories. Guess what I learned? Peanut butter actually has a compound that FIGHTS stress! It's called beta-sitosterol, which can normalize high levels of the hormone cortisol, which is released in your body when you're stressed out. It's also a hormone that signals to your body (especially women) to hold on to some of those pockets of abdominal fat for later in case you might need them.

So what do you do about all this? Listen to your body! Cravings are there for a reason. However, this doesn't give you license to just down a jar of peanut butter with abandon. Put some thought into the WHY behind your craving. Try adding a little more healthy fat and a little more carbs into your diet. Don't be scared of the carbs... and remember... like fat, not all carbs are created equal. Try a little sweet potato, or some fruit when you're feeling a little punchy. Reflect on your habits and try to pinpoint any sources of stress. Are you getting enough sleep? Are you taking any "me" time to relax during the day? What does the rest of your diet look like? How are your relationships with your co-workers? Family? Spouse? Kids?

Remember, life is all about BALANCE.

So, don't punish yourself for your peanut butter binge. Instead, understand the causes, and make some small adjustments to alleviate that next pantry attack.

xoxo,
A

Thursday, September 10, 2015

Crap! I Cheated on my Diet! What do I DO?!

As a coach, I literally get this question ALL the time. Hell, I've even wondered what to do myself. Long story short? You're human. It happens. It'll happen to you, and it certainly happens to me. The most important thing to do? Forgive yourself, don't dwell in the moment, and move on. Don't make that cheat meal a cheat day... or (gulp) a cheat WEEK. Simply enjoy it for what it was... a treat, and keep moving forward.


Now that you've read that, take a deep breath. Here is something else you need to consider...

Don't use the scale as a measurement tool. There's NO WAY you did enough damage this weekend for you to gain 5lbs worth of fat. You'd have had to eat like 40 slices of pizza last night ON TOP OF your normal calorie intake for that to happen. You didn't, did you? I'm pretty sure that's physically impossible, anyway. :)

Chances are the number you're seeing on the scale is reflecting fluid retention from all the salt... OR you've been eating at such a caloric deficit as part of your nutrition plan that your muscles were starved of glycogen when you decided to indulge... thus increasing your glycogen stores (not a bad thing!) and perhaps altering the number on a scale a bit.

This has definitely happened to me before. When I was doing the Countdown to Competition eating plan with 21 Day Fix Extreme, I was operating on very little carbohydrates. When I was finished with 3 weeks of that, the next day I definitely had a cheat meal (or two). Did I see the scale change a little? Yes. Did I freak out? No. Why? Because the very next day I jumped right back into a maintenance calorie bracket and continued with my healthy eating, and everything evened itself out.

So what's the bottom line? Although you should definitely try your best to stick to the nutrition plan that corresponds with your program and fitness goals, an OCCASIONAL slip won't derail all of your hard work and progress. The important thing is to make sure your slip doesn't turn into a landslide.

Keep up the great work, everyone!
-A


Friday, September 4, 2015

Skinny Mac and Cheese? YES PLEASE

So this recipe is one I adapted from Skinny Taste, and it's REALLY delish. Mac and Cheese is one of my favorite "comfort foods" by far, and any way that I can "healthify" it at all, I'm all about it!

Here's what' you'll need:

  • 12 oz elbow macaroni (I use gluten-free quinoa pasta)
  • 1 1/2 tbsp butter (Kerry Gold is my fave)
  • 1/4 cup minced onion
  • 1/4 cup almond or coconut flour
  • 2 cups unsweetened almond milk
  • 1 cup fat free, low sodium chicken broth (vegetarians use vegetable broth)
  • 8 oz (2 cups) reduced-fat sharp cheddar 
  • salt and fresh pepper to taste
  • 12 oz fresh broccoli florets (I used pre-cut bag)
  • 2 tbsp grated parmesan
  • 1/4 cup seasoned bread crumbs
  • cooking spray

Here's what you'll do with it:

1. Cook pasta and broccoli together in a large pot of salted water, according to package directions for al dente (or slightly under cook 2 minutes). Spray a baking dish with cooking spray. Preheat oven to 375°.

2. In a large, heavy skillet, melt butter. Add onion and cook over low heat about 2 minutes, add flour and cook another minute, or until the flour is golden and well combined. Add milk and chicken broth and whisk, raising heat to medium-high until it comes to a boil; cook about 5 minutes or until the sauce becomes smooth and thick. Season with salt and pepper.

3. Once the sauce is thick, remove from heat, add cheese and mix well until cheese is melted. Adjust salt and pepper to taste, add cooked macaroni and broccoli and mix well. Pour into prepared baking dish. Top with grated cheese and breadcrumbs. Spray a little more cooking spray on top.


4. Bake for 15-20 minutes, then broil for a few minutes to get the breadcrumbs golden.


Enjoy, my friends!! 

Tuesday, August 25, 2015

Superfoods for GORGEOUS Skin

Anyone else out there every struggle with their skin? I've tried like a GAZILLION products... basically if it's on the market, I've more than likely bought it. Lately, I've been looking into how the foods I am eating (you know, in my quest for everlasting health and fitness, right?!) affect my complexion, and here's what I've discovered...

Not only does eating clean help you keep extra weight from creeping on, but it actually makes you MORE BEAUTIFUL. I don't know about you, but I'm not in a position to be rejecting extra beauty, haha. When you take care of yourself your health radiates from the inside out! Good nutrition naturally nurtures healthy, glowing skin to help keep it free of acne. I always wondered why many skin-nurturing beauty products on the market sound like you could eat them... a lot of them have ingredients like citrus, acai berries, camu-camu and other potent superfoods in them; apparently, these ingredients are as good for you insides as they are for your exterior.

Good nutrition also can do wonders for strengthening your hair from heating products you may use every day and it also supports healthy growth and texture. Finally, when you’re eating right you may also notice your nails become stronger, grow faster and maybe don’t crack and break as often. This is all thanks to good nutrition! So what should you be eating to enrich your hair, skin and nails?
Here are a few ingredients that are great for all of the above. You can find these ingredients in many foods at your local grocery store and you can find ALL of them in Shakeology, which is ridiculously easy for a crazy busy teacher like myself!


.

Wednesday, August 19, 2015

I'm BAAAAACK!! Time to get BEASTY :D

My FITFAM!!

Thanks for bearing with me as I took the summer to reconfigure LIFE a bit. :)

As a middle school teacher, summers are pretty precious. This summer, my husband and I decided to do a good bit of traveling and spend time at the beach, as well as re-evaluate some of our plans for the rest of 2015 and 2016. And let's just say that in this summer whirlwind, my proverbial dance card got mega full. Unfortunately, the blog was one of the things I took off my plate for a few weeks. HOWEVER, I have been collecting TONS of great content to share with you! From recipes to fitness tips to PERFORMANCE SCIENCE... (yes, this teacher got SCHOOLED this summer!), I've got so many fun things to share in the coming weeks! 

So you may (or may not) be wondering... what the heck have I been up to?! Lazy middle school teacher, vacationing all summer! Well, not exactly. On a personal note, David (the hubs) and I have been struggling with selling our town home. It's been a vortex of showings, offers, and... no contracts. Our buyers just can't seem to get their financing. So in true teacher fashion (yes, he's a teacher too... it's how we met! ) we've been working on a "Plan B"... saving money like it's going out of style, and paying off debt. I'm really happy to announce that as of last week, we have completely ELIMINATED our credit card debt. HAPPY DANCE!!! 

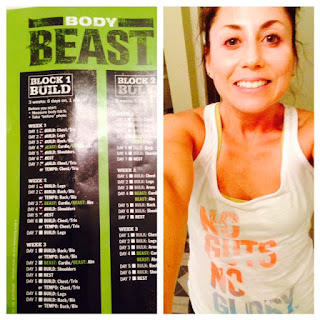
Fitness-wise, I took on a challenge I thought I'd NEVER do. I'm a cardio girl and love my Insanity workouts, so lifting weights has always been something I've shied away from. Enter... THE BEAST: 
I'm tackling one of the toughest programs I've ever encountered... it's called Body Beast, and it's all about heavy weight lifting. I'm trying to grow muscle and also decrease my body fat percentage, and I'm learning so much about the nutrition side of what occurs in your body post-workout, overnight, and during the workout so I can fuel it correctly for maximum results. I'm now in Week 5, and I've got 8 more to go... so not quite half way! I'll keep you guys posted as I continue to learn and experience more in this new realm (well, new to me) of my fitness world. :)

New post coming soon! xoxo, Alison 

Thursday, June 11, 2015

How Do You Break a Plateau?

I get asked this A LOT. In fact, I've even asked MYSELF this question, ha. It seems like you get on a roll... you're eating well, you're working out every day, and you're KILLING IT. Or so you think.

For me, I can be a master of discipline and precision. However, I just wasn't losing that extra little bit of "pooch" in my lower stomach. I was doing all KINDS of ab exercises, insane cardio workouts (literally... Insanity! Haha), and some weight training, too. But that layer of fat over my lower abdominal wall was killing me. Not literally, but I was working wayyyy too hard for those abs to NOT make an appearance! Can you relate??

So here are some research-based strategies that have helped ME break my plateau... hopefully they can help you with yours, too!

1. Zigzagging my calories: You're probably wondering what the heck that means. When I first saw this, I was wondering the same thing. Let me break it down for you...

Body builders call this "refeeding" the body. Basically, you're eating at a a caloric deficit on some days and you're eating more calories on others. Hence the name. Why? You're keeping your body guessing. What USED to work for you in the past is no longer cutting it, because you're now MORE fit, and you require MORE calories to continue progressing toward your goals.

So, What might this look like? Let's say you need 2000 calories per day. You might eat 2000 calories per day 3-4 days per week and 1500 calories on the other days. If you’ve been eating a low-calorie diet you can assume you need to add calories. To find out how many, try increasing by 300–600 a day (depending on your size). Eat that way 4 days per week while keeping calories where they are now on the others.

2. Working out (especially on cardio days) on an empty stomach. You'll burn stored fat instead of the meal you just ate an hour earlier for energy.

3. Get enough protein, and don't cut out fats and carbs. The trick here is getting your numbers right. Goal for about 40% carbohydrates and 20-25% HEALTHY fats (think avocados, nuts, seeds, etc.)

4. You can't diet restrictively ALL the time. I had a hard time letting go of this one. I thought that to look good, that meant that I had to be on point CONSTANTLY. Your body adapts. You have to change it up... and more importantly, you have to ENJOY life! :)

These are just a few little snippets I've learned along the way... and believe me, I'm still learning! I'd love to hear from you if you're looking for a little advice, some support, or even accountability in reaching your personal fitness goals.

Tuesday, June 9, 2015

Coconut Raspberry Loaf... Bring it!

Wanna have your "bread" and eat it, too?

Lookie what I found... this one was shared on Instagram by @GoldFenger and it's AMAZING. My husband even ate it! Not that he doesn't like my cooking... he's just a big wheat-eater, and can "tell" when I sub out other ingredients. 

Anywho... here's what you'll need for this little ditty:

  • 1/2 cup coconut flour
  • 1.5 cups almond flour
  • 1/4 cup ground flaxseeds
  • 1.5 tsp baking powder
  • 1 tsp vanilla extract
  • a pinch of sea salt (I prefer Himalayan salt)
  • 4 whole eggs
  • 1 cup raspberries
What do you do with it?

1. Preheat your oven to 400F. 
2. Whisk your eggs together and combine everything except the raspberries. You'll fold those in at the end. 
3. Put the dough in a baking tray for 30 minutes, or until golden brown (my tray was bigger, so the depth was pretty shallow... it cooked in half the time).
4. Store in the fridge! :)


Thursday, June 4, 2015

Whole Wheat Peanut Butter Cup Pancakes!

And THEN, I fell in love. Breakfast foods. Peanut Butter. Chocolate.

I may have just died and gone to heaven.

While trolling around on the internet, I found these, done by Handle the Heat, a culinary school graduate in Arizona. I HAVE to share. P.S., these bad boys are MINE on Saturday morning! :)
Suuuuper simple recipe, which I love...

What you'll need:

  • 1 cup (4.5 ounces) white whole wheat flour
  • 1 teaspoon baking powder
  • 1/4 teaspoon fine salt
  • 1 cup almond milk (or other milk)
  • 1/3 cup peanut butter, plus more for garnish
  • 2 teaspoons granulated sugar
  • 1 large egg
  • 1/2 teaspoon vanilla extract
  • 1/3 cup chocolate chips, plus more for garnish
  • 1/3 cup peanut butter chips, plus more for garnish
  • Maple syrup, if desired


What you'll do with it:


  • In a large bowl combine the flour, baking power, and salt.
  • In a medium heatproof bowl combine the almond milk and peanut butter. Microwave for 30 seconds and stir. If needed, continue microwaving in 15-second bursts, whisking, until the mixture is smooth. Whisk in the sugar, egg, and vanilla then stir in the chocolate chips and peanut butter chips.
  • Add the wet ingredients to the flour mixture and stir until just moistened, being very careful not to overmix.
  • Grease a nonstick griddle or skillet with nonstick cooking spray or butter and heat to medium-high heat (about 350-375°F). Drop 1/4 cup portions of batter onto the hot griddle and gently spreading the batter to form a disk. Cook until bubbles begin to appear on the surface and the edges are dry. Flip and cook the other side until golden brown and cooked through. Repeat with the remaining batter.
  • Serve hot with more melted peanut butter, chocolate chips, peanut butter chips, and maple syrup if desired.

Monday, June 1, 2015

My 21 Day Experience...

Summer... a love/hate experience for me. Let me explain why...

The transition from spring to summer has always been a little anxiety-driven for me. The weather turns warmer, people invite you to more "stuff," and there's always some event you have to go to, right?! Weddings, birthdays, cook-outs, baby showers, and... oh yeah... for us coastal people, THE BEACH.

It's not that I don't love those things. I totally do! I really love hanging out with my friends and having a good time. But I also want to be comfortable in my own skin, too. One of the things I love most about what I've been doing is I feel like I can finally eat whatever I want, and still get amazing results. The magic is in those Rainbow Brite containers, and in those 30 minute daily workouts.

So I use the term "magic" loosely. Really, the "magic" is in YOU. Have you decided that you want a healthier, stronger, leaner you? Have you committed to making that happen by following the nutrition and fitness plan? Then YES,

You.
Will.
SUCCEED.

21 Days. Not a hell of a long commitment, but it's 3 weeks of forming good habits and breaking bad ones. And yes, wine is allowed. And chocolate.

So what does this look like?? Pretty simple, actually...


Does this look like something you could do? I actually started a group TODAY focusing on the ins and outs of the meal plan and how to work those Rainbow Brites. :) We're starting with the workouts on the 8th, so if you need to refocus, recommit to yourself, and you want to slim down a bit for those summer events, hit me up!

Thursday, May 28, 2015

Ginger Peach Pudding Parfait... Oh My!!

So I was perusing my US Weekly (don't judge me) and came across this AMAZING looking recipe that's totally 21 Day Fix approved... I'm in the throws of another round, and as you know, I have a wicked sweet tooth. Let me just say, this totally hits the spot.

Ginger-Peach Pudding Parfait


What you'll need:

  • 1 cup unsweetened almond milk
  • 1.5 TBSP vanilla protein powder (I choose to use Shakeology)
  • 3 TBSP chia seeds
  • 1 tsp ginger
  • 1 cup diced peaches
  • 1/2 cup all natural granola or oats
  • 1/4 cup unsweetened shredded coconut
What you'll do with it:
1. In a blender, combine the almond milk and protein powder until smooth. Stir in the chia seeds and ginger (and oats, if using), and refrigerate overnight. 
2. In 2 dishes, layer the chia pudding with the peaches, granola (if using), and coconut. Serves 2!

Enjoy! Share with a friend who'd LOVE this recipe!

Monday, May 25, 2015

Chocolate Coconut No-Bake Cookies...

What if you could have cookies that looked like this...
and not feel ANY guilt?!

Introducing... Chocolate Coconut No-Bake Cookies!!

What do you need?

  • 1/2 tsp ground cinnamon
  • 1/2 cup rolled oats
  • 3/4 TBSP chocolate protein powder (I choose Shakeology)
  • 1/4 cup unsweetened shredded coconut
  • 2 TBSP cacao powder
  • 3 TBSP honey
  • 2 TBSP coconut oil (melted)
  • 1/2 tsp vanilla extract
What do you do with it?
1. In a bowl, combine the cinnamon, oats, protein powder, coconut, and cacao. In another bowl, combine the honey, coconut oil, and vanilla. Stir together.
2. Form into 6 cookies and place on an unlined cookie sheet. Freeze for at least 2 hours. Serves 2!

Enjoy, friends!

Thursday, May 14, 2015

So this 3 INGREDIENT PEANUT BUTTER FRUIT DIP totally blew my mind...

You guys... isn't Pinterest the BEST?! I swear, I get so many really great ideas from there that I use in my every day life... recipes, hair, nails, workout ideas... you name it and you can find it on Pinterest.

Here's my latest discovery... I can't WAIT to try this fruit dip. I mean, anything with peanut butter is basically golden in my book, but add honey and yogurt?? I may have just hit the jackpot.

It's so simple, it's ridiculous.

  • 1 TBSP honey
  • 1/3 cup creamy peanut butter
  • 10.5 oz Greek yogurt. 
Blend and enjoy! :)

Tuesday, May 12, 2015

Vegan Roasted Red Pepper Pasta...


    Ok. So I come from an Italian family, and we LOVE pasta. Way too much, in fact. I love the starch, and I love the cream sauces. Doesn't everyone?! Ha.


    However, they don't have a whole lot to offer nutritionally. So I'm constantly on the lookout for recipes or ideas that satisfy the "cream sauce" monster in my little Italian brain, but that still offer some nutritional benefits.

    Enter... Vegan Roasted Red Pepper Pasta <3

    First, I need to give credit where credit is due. This gorgeous creation is courtesy of the Minimalist Baker, and I found it on Pinterest. I highly recommend checking out their site for some delicious ways to spice up your menu. :)

    Here's what you'll need:
  • 4 cloves garlic 
  • fresh parsley/basil 
  • 2 red bell peppers 
  • 2 shallots 
  • 1.5 TBSP cornstarch (or arrowroot powder) 
  • 2 TBSP nutritional yeast 
  • red pepper flakes 
  • salt/pepper 
  • 1.5 cups unsweetened almond milk 
  • 2 TBSP olive oil 
  • 12 oz. gluten free pasta 
  • vegan Parmesan cheese 


  • Here's what you do with it:

    1. Heat oven to 500 and roast red peppers on a baking sheet until charred - about 25-30 minutes. Cover in foil for 10 minutes to steam, then remove (peel away) charred skin, seeds and stems. Set aside.

    2. Cook pasta according to package instructions; drain, toss in a touch of olive oil, cover with a towel and set aside.

    3. While the red peppers are roasting, bring a large skillet over medium heat and sautee onion and garlic in 2-3 Tbsp olive oil until golden brown and soft - about 4-5 minutes. Season with a generous pinch of salt and pepper and stir. Remove from heat and set aside.

    4. Transfer sautéed shallot and garlic to blender with roasted peppers, almond milk, nutritional yeast and cornstarch. Season with desired amount of salt, pepper and red pepper flakes.

    5. Blend until creamy and smooth, taste and adjust seasonings as needed, adding more salt and pepper or nutritional yeast for flavor. You want the flavor to be pretty robust and strong since the noodles don't have much flavor - so be generous with your seasonings.

    6. Once blended, place sauce back in the skillet over medium heat to thicken. Once it reaches a simmer, reduce heat to low and continue simmering.

    7. Once sauce is thickened to desired consistency, add noodles. However, before tossing add a touch more olive oil, salt and pepper to the un-tossed noodles for added flavor. Then, toss to coat. 
    8. Serve with vegan parmesan, red pepper flakes and fresh chopped parsley or basil.

Thursday, May 7, 2015

Superfoods for GORGEOUS Skin

I'm always looking for natural ways to enhance the appearance of my hair, skin, and nails. In my never-ending pursuit of knowledge (I literally research the hell out of EVERYTHING that interests me... maybe it's the teacher in me!), I came across this article housed in the Beachbody Blog. I absolutely LOVE the advice and the tips for ingredients I should be looking for to counteract some of the damage that comes with sun and aging... not to mention the grey hairs I keep pulling out. Ha!!


"It’s no secret a healthy diet and active lifestyle does wonders for your appearance. Not only does eating clean help you keep the weight off, but it also enriches your beauty. When you take care of yourself your health radiates from the inside out! Good nutrition naturally nurtures healthy, glowing skin to help keep it free of acne. That’s why many skin-nurturing beauty products on the market have ingredients like citrus, acai berries, camu-camu and other potent superfoods in them; these ingredients are as good for you insides as they are for your exterior.

Good nutrition also can do wonders for strengthening your hair from heating products you may use every day and it also supports healthy growth and texture. Finally, when you’re eating right you may also notice your nails become stronger, grow faster and maybe don’t crack and break as often. This is all thanks to good nutrition! So what should you be eating to enrich your hair, skin and nails? 

Here are a few ingredients that are great for all of the above. You can find these ingredients in many foods at your local grocery store and you can find ALL of them in Shakeology.

Biotin: Helps promote the health of hair, skin, and nails.
Chlorella: Phytonutrient that helps support healthy skin.
Citric Acid: Helps provide antioxidant protection for the skin.
Folic Acid: A deficiency may cause gray hair.
Cocoa: Antioxidant support for healthy skin.
Gingko: Antioxidant support for skin and promotes healthy circulation.
Goji Berry: High in antioxidants which help minimize damage from free radicals that injure cells and can damage DNA.
Grape Seed Extract: Used to protect collagen and elastin in skin (anti-aging).
Green tea: Comes from the Camellia Sinensis tea plant, which is rich in antioxidants and that detoxify cell-damaging free radicals in the body.
Magnesium: Can help cells repair faster.
Pantothenic Acid (Vitamin B5): Helps reduce signs of aging, skin disorders, and gray hair.
Schisandra: Helps to prevent aging.
Vitamin A: Is often used to help skin conditions including acne, eczema, psoriasis, cold sores, wounds, burns, and sunburn.
Vitamin B2 (Riboflavin): Used for treating acne, maintaining healthy hair, skin and nails. It also has anti-aging properties.
Vitamin B6: Beneficial for acne and various other skin conditions.
Vitamin C: Powerful antioxidant that can be used to help repair and firm the skin.
Vitamin E: Stimulates the production of collagen and elastin, primary components of your skin that help prevent scarring from wounds and acne.
Vitamin K: Helps promote healing and helpful for mild bruising and swelling."

Monday, May 4, 2015

Slow Cooking up a STORM!

So I sincerely forgot how AWESOME the Crockpot is. I mean, seriously. Set it and forget it. How simpler can it get?!

Last week, my husband David requested a special birthday dinner. Lucky for me, it was easy as hell to make. But in the end, you've whipped up this amazing meal, and you look like (a leaner, sexier version of?) Betty Crocker. :)

Behold... Honey Garlic Chicken!!

Want to know how to make it?
Here's what you'll need:

  • 4 skinless, boneless chicken thighs (I have also used breast cutlets)
  • 1/2 cup soy sauce (I used Bragg's Liquid Aminos)
  • 1/2 cup ketchup (I use Publix Greenwise organic)
  • 1/3 cup honey
  • Garlic to taste (I used 4 cloves, minced)
  • Dried basic to taste (I used 1 tsp)
What you want to do with it:
  • Lay your chicken at the bottom of the slow cooker.
  • Whisk all other ingredients together in a bowl.
  • Pour mixture over chicken.
  • Set on low and cook about 6 hours. 
David likes when I serve it over brown rice, because he likes to drizzle the extra "juices" over it. I also like to serve with oven-roasted asparagus. So good!!

Enjoy!! Share with a friend who is a fellow chicken and/or slow cooker-lover! :)

Thursday, April 30, 2015

The Ever Elusive Abs... How do you GET Them?!

As a health and fitness coach, I've been asked this question quite a bit in the last year. Hell, I've even asked it myself. I don't profess to be an all-encompassing expert, but I HAVE done my research. And I've definitely tried (and failed) and tried again all KINDS of different "plans" and "strategies" out there. Some more effective than others.

Don't get my wrong, I'm STILL on my quest for abs. But I am making progress...


So here's what I've discovered...

1. Nutrition plays THE MOST IMPORTANT ROLE in getting (and keeping) a defined midsection. If you want abs, you HAVE to eat right. More importantly... if you eat more than you are burning in a day, you're going to store fat in the form of a layer of "fluff" hiding those abs. Why would you sabotage all that hard work if you're just going to hide it?

2. When you train, you HAVE to train at a HIGH INTENSITY to keep your metabolism raging! Not only is this way of cardio training more efficient, but you'll see mega changes in your body so much faster. Stay away from the treadmill, the elliptical, and that exercise bike! I suggest HIIT workouts like Chalene's Turbofire, Shaun T's Insanity Max, Plyometric workouts, etc. Anything that gets you gasping for breath for short bursts of time, and gives you a short period of rest before you blast into action again.

3. Planks are amazing for your core strength! Plank everywhere... practice holding it for longer each time, and practice different plank variations.

4. There is no magic pill! Believe me, I've tried to find some. They might be marketed, but they don't exist. Getting a defined midsection is all about hard work. 70-80% of it is hard work in the kitchen, and 20-30% of it is the hard work you do in your workouts. :)

Tuesday, April 28, 2015

Caramel Apple GRILLED CHEESE SANDWICH!!

So here's the sitch... as I was (purposefully, of course... haha) scrolling around on Instagram, I came across this little treasure, courtesy of @lilsipper.

What is this ooey gooey mess of awesomeness? A "Caramel Apple Pie Grilled Cheese Sandwich"!

Hold up. Pie? Cheese? Together? You'd think this would be disgusting. But think of it. It's PIE. And CHEESE. With a healthy twist and sooo much taste. Don't knock it til you try it!

So what do you need?

  • 1/2 medium apple 
  • whatever kind of break you want (I go with Ezekiel bread myself)
  • 1/4 cup of dates (I prefer Medjool dates... they are like crack, haha)
  • 2 slices of white cheese or cheese alternative (I like brie... or swiss)
  • A bunch of cinnamon!
What do you do with this stuff?
  • Slice up your apple and boil it in enough water to completely submerge the apples. 
  • Soak your dates in hot water for 5-10 minutes. 
  • Puree your dates (sans water) until it becomes a paste. If you need to add a little bit of the soaking water to liquify it a little more, go for it!
  • Heat up your pan with some coconut oil.
  • Place 1 slice of bread on pan, then layer 1 slice of cheese, apples, "caramel sauce" (date sauce), and sprinkle some cinnamon. Then top with another slice of cheese and 2nd slice of bread. 
  • Grill that badboy until both sides are a nice golden brown and the cheese is sufficiently melty, gooey, and AMAZEBALLS. 
  • Enjoy!! :)
Does this look like something you'd like to try? Share with a fellow cheese-lover!!

Thursday, April 23, 2015

Pizzaaaa!!!

So... what do you do when you have a WICKED pizza craving, but you've already eaten your allotment of carbs for the day?

I give to you....

Eggplant Pizza!!!

This is a recipe I adapted from Julia Child, actually. So basically pizza is pretty healthy on it's own. There isn't anything magical about it... it's when you really think about the nutritional quality of the dough that you realize that you can definitely satisfy that craving in a completely healthy way a little differently. Not that there's anything wrong with eating a few slices of pizza here and there... but if you're a pizza LOVER and gotta have that fix at least once a week, here's a healthier alternative.

How you should roll:
1. Preheat your oven to 350.
2. Slice your raw eggplant 1/2 to 1 inch thick, depending on your preference.
3. Coat your eggplant slices lightly with coconut oil, then bake 15-20 minutes.
4. Take your eggplant slices out of the oven, and adorn with tomato sauce, oregano, salt and pepper, garlic, and onion powder. Then, top with cheese and any other "toppings" you'd prefer. I like diced mushroom myself. :)
5. Pop back in the oven for about 10 minutes, or until cheese is melty and bubbly.

Enjoy!!

Tuesday, April 21, 2015

White Chocolate Protein PBJ Cups! YUMMO

White Chocolate Protein PBJ Cups... would you try these??

***Share this recipe with a friend if these look good to you! ;) <3


How to make these delectable treats:

1. Melt 2 TBSP coconut oil.
2. Stir in 1/4 cup P28 White Chocolate Peanut Butter
3. Fill bottom of mini cupcake liner.
4. Freeze 15-20 minutes.
5. Put small spoonful of reduced sugar/natural jam of choice in the middle.
6. Cover jam/fill liner with remaining PB.
7. Freeze until solid (roughly 30 minutes to an hour).
8. ENJOY!!

Tuesday, April 14, 2015

The most delicious vegetables you'll ever eat!!

So... confession. I kinda hate vegetables. And by kinda, I mean I really do. You might have noticed that by now. Really, most of these blog posts actually revolve more around turning desserts (my heart and soul, haha) into healthy treats or creating healthier versions of some of my favorite comfort foods, like french fries and mac and cheese.

Well my friends, enter BAKED PARMESAN ZUCCHINI!
These badboys (along with the purchase of a Vegetti) have completely changed how I feel about vegetables on my plate. No longer are they the things I MUST eat because they are good for me, but they can, indeed, become the things I CRAVE.

So, how do you put this yummy masterpiece together? Here's what you'll need:
  • 4 zucchini, quartered lengthwise
  • 1/2 cup grated Parmesan
  • 1/2 teaspoon dried thyme
  • 1/2 teaspoon dried oregano
  • 1/2 teaspoon dried basil
  • 1/4 teaspoon garlic powder
  • Himalayan salt and freshly ground black pepper, to taste
  • 2 tablespoons coconut oil
  • 2 tablespoon chopped fresh parsley leaves
And here's what you'll do with it all:
  • Preheat oven to 350 degrees F. Coat a cooling rack with nonstick spray and place on a baking sheet; set aside.
  • In a small bowl, combine Parmesan, thyme, oregano, basil, garlic powder, salt and pepper, to taste.
  • Place zucchini onto prepared baking sheet. Drizzle with coconut oil and sprinkle with Parmesan mixture. Place into oven and bake until tender, about 15 minutes. Then broil for 2-3 minutes, or until crisp and golden brown.
  • Serve immediately, garnished with parsley, if desired.
Enjoy!! :D

Wednesday, April 8, 2015

Healthy Sweet Potato FRIES!!

Ok. So here's my back story. I've always been a sweet potato lover. It's been my favorite food since... well, since infancy. In fact, I loved sweet potatoes so much (and my mom continued to feed them to me since I loved them so much- thanks, Mom) that I did, in fact, turn orange. True story.

Don't get me wrong, I love a good baked sweet potato. Bake it in the over and throw some cinnamon on that shizz and you've got heaven on a plate. However, nothing... I repeat, NOTHING tastes as good as a delicious french fry. Put the two together? BAM. Instant bliss.

But you know, there's a drawback in all of that fried goodness. It's.. well... FRIED. So let's circumvent that, shall we?

Here's what you'll need:

  • 2 large garnet yams or sweet potatoes, cut into wedges
  • 2 tablespoons coconut oil
  • 1 tablespoon chili powder
  • 1 tablespoon cinnamon
  • 1/4 teaspoon cayenne
Here's what you'll do... so easy it hurts!


1. Preheat oven to 425ºF.
2. Toss cut sweet potatoes in coconut oil and spices. Make sure every wedge is evenly coated.
3. Roast cut-side down for 30 minutes, turning once.

Enjoy!

Wednesday, March 25, 2015

Mac Attack!! A healthier version even your Mama will LOVE!

So anyone who knows me well KNOWS that good ole home grown mac and cheese is one of my most FAVORITE things in the world to eat. Unfortunately, and I'm sure if you're reading this you can certainly attest to this as well, eating it too frequently is not very friendly for my waistline. So in my pursuits to have my comfort foods and eat them too on this wild fitness journey of mine, I have come across a little recipe I'd like to share with all my fellow Mac and Cheese lovers out there.

Mac and Cheese Lovers of the world... UNITE!! Hehe :)
What You'll Need:

  • 12 oz macaroni of your choice (brown rice noodles are great here if you're gluten free)
  • 1 1/2 tbsp grass fed butter (I use Kerry Gold) OR you can sub out coconut oil. Also delicious.
  • 1/4 cup minced onion
  • 1/4 cup flour (I use almond flour)
  • 2 cups skim milk (I use unsweetened almond milk)
  • 1 cup fat free, reduced or low sodium chicken broth (vegetarians use vegetable broth)
  • 8 oz (2 cups) reduced-fat sharp cheddar (2% works nicely)
  • salt and fresh pepper to taste
  • 12 oz fresh broccoli florets (I am lazy so I use the pre-cut kind in the steam bag)
  • 2 tbsp grated parmesan
  • 1/4 cup seasoned bread crumbs (crunching up a few Melba Toast crackers works really great here)
  • cooking spray

What You Do With All of This:

1. Cook pasta and broccoli together, according to package directions for al dente (or slightly under cook 2 minutes). Spray a baking dish with cooking spray. Preheat oven to 375°. ***If you're using a pre-cut steam bag of broccoli like me, just microwave that shizz and add it to the pasta later :)

2. In a large, heavy skillet, melt butter or coconut oil. Add onion and cook over low heat about 2 minutes, add flour and cook another minute, or until the flour is golden and well combined. Add milk and chicken broth and whisk, raising heat to medium-high until it comes to a boil; cook about 5 minutes or until the sauce becomes smooth and thick. Season with salt and pepper.

3. Once the sauce is thick, remove from heat, add cheese and mix well until cheese is melted. Adjust salt and pepper to taste, add cooked macaroni and broccoli and mix well. Pour into prepared baking dish. Top with grated cheese and breadcrumbs. Spray a little more cooking spray on top.

4. Bake for 15-20 minutes, then broil for a few minutes to get the breadcrumbs golden.

I'd love to hear what you think of this dish. My plan? Surprise the fam and cook this bad boy for an Easter side! :)

Thursday, March 12, 2015

Healthy Peanut Butter Ice Cream Sandwich! What is WRONG with me?!

So here's a delectable little "Friday Eve" treat... I found this on Instagram, and the "chef" is @staysharpbestrong. I don't have a whole lot to say here, except GIMME! :D


What you'll need for the "cookie sandwich":

  • 1/2 cup almonds
  • 1/2 cup pitted dates
  • 1 heaping TBSP natural peanut butter
Blend these ingredients until they are smooth, and roll them into medium sized balls and flatten them out. Then, place them on a tray coated with cling wrap and put in the freezer.

What you'll need for the Chocolate Ice Cream:
  • 1 frozen banana
  • 1 TBSP honey
  • 1 heaping TBSP of raw cacao powder
  • tiny pinch of himmy or sea salt
Blend all THESE ingredients until smooth. Use a small bit of water or almond milk if your blender is having any trouble making it smooth. Spoon onto one frozen "sandwich" and cover with the other. Freeze for an hour... and ENJOY!!


Friday, March 6, 2015

I Scream.. YOU Scream.. WE ALLLL SCREAM for...

ICE CREAM!!!

Ok, so in my pursuits, I stumbled across this gem... and naturally, had to make it immediately. It just made sense. Every ingredient here could be accounted for in my current 21 Day Fix regimen, so it doesn't count as a "treat" or "cheat." HOWEVER, it sure does taste like one.

I give you...
Vanilla Peanut Butter Banana Ice Cream.
(Go ahead, drool.)
Ok... so here's what you'll need:

  • 1 cup nonfat milk or unsweetened almond milk
  • 2 scoops of Vanilla Shakeology (my shake of choice... nutritionally subpar to none, but you can substitute your favorite meal replacement shake here)
  • 2 medium frozen bananas (cut into chunks before freezing)
  • 2 TBSP all natural smooth peanut butter
How to make it:
1. Place milk, Shakeology, bananas, and peanut butter in high-powered blender, cover, and blend on low for 5 seconds. 
2. Increase power to high and continue blending for 30 seconds or until smooth.
3. Pour mixture in a large glass bowl and COVER. 
4. Freeze for 4 hours, and be sure to stir every 30 minutes before serving. 

This will create 5 servings of about 1/2 cup each. Enjoy!


Tuesday, March 3, 2015

Avocado? In a Cookie?! Get out of here...

So, as usual, I was trolling the internets for a healthy way to curb my sweet tooth, and I came across this little number... as I was scoping it out, I thought to myself:

"Avocado. And chocolate... together... I don't know about that. That actually sounds pretty gross. What the hell, here goes. "

The next day I opened the fridge, took a look at the avocado I bought last Sunday that was dangerously close to being overripe, and I tried it out. Mine turned out a little messy, but the taste?! OMG.

So here it is... I'm sharing it with y'all. My recommendation, however, is to enjoy these cold.
What You'll Need:
  • 3/4 cup of very ripe avocado
  • 1/2 cup of honey OR 1 banana
  • 1 egg
  • 1/2 cup dark cocoa powder
  • dark chocolate chunks/chips (I used a few handfuls- I know, not very specific)
  • 1/2 tsp of baking soda
What To Do:
  • Preheat your oven to 350 degrees.
  • In a large bowl or in a blender, mix together the avocado, honey (or banana), and the egg.
  • Slowly mix in the cocoa powder and the baking soda. 
  • Stir in the chocolate chips/chunks by hand. 
  • Spoon the batter on a non-stick baking tray, and be sure to flatten them out a little. 
  • Bake for about 10 minutes, then cool them. Place in the fridge overnight when you are done.
You can also experiment by adding different flavored extracts... mint and caramel, for example. Also, you can add peanut butter chips or butterscotch chips for a different taste as well! :)

Enjoy!
A

Wednesday, February 25, 2015

If Sweet Potatoes and Waffles Had A Baby...


So basically, two of my favorite foods have gotten together, gotten a little frisky, and created an incredibly delicious love child... which I will now share with you. 

Friends, I give you... the SWEET POTATO WAFFLE. :D

Here's what you'll need:
  • 4TBSP melted coconut oil
  • 1/4 cup canned coconut milk
  • 2 large eggs, beaten
  • 1/2 cup coconut flour
  • 1/2 tsp baking powder
  • 1/2 tsp baking soda
Here's how you'll make the "batter":

1. Preheat oven to 425 degrees. 
2. Slice the potatoes in half, wrap in foil, and bake for 50 minutes until fork tender. 
3. Allow potatoes to cool, then remove flesh and discard the skins. 
4. Add the potatoes to the rest of the wet ingredients and just combine all. 
5. In a separate small bowl, combine all of the dry ingredients. 
6. Add the dry mixture to the wet mixture until they are fully combined. 
7. Follow your waffle maker's instructions and work in batches (roughly 1/4 cup of batter per waffle). 
8. Enjoy the SHIT out of these badboys. :)

Wednesday, February 18, 2015

So... how do you feel about doughnuts??

So by now, you know that I love dessert. I mean, I FREAKING LOVE DESSERT. If I could "shout it from the rooftops," so to speak, I'd do it on a daily.

I haven't had a doughnut in so long... simply because these days I'd rather spend the calories on something a little more nutritionally dense. However, I'd be lying if I didn't admit that sometimes these delectable treats don't pop up in a dream or two.

With that said, I thought it might be worth my time to scour the internets and find a "skinny" doughnut recipe worthy enough to share with my friends... and I hit the mother load with this one!

Ready for it?!
It's a Skinny Vanilla Bean Doughnut. <insert drool here>
So how do you make this delectable little devil?


Ingredients:
Donuts:
1 C. Whole Wheat White Flour
1/4 C. Sugar/Sweetener/Honey (I used half sugar and half sweetener.)
1 Tsp. Baking Powder
1/4 Tsp. Ground Cinnamon
1 Large Egg
1/4 C. Plain Fat Free Greek Yogurt
2 Tbsp. Fat Free Milk
1 1/2 Tbsp. Light Butter, Softened
1 Tsp. Vanilla Bean Paste

Vanilla Bean Glaze:
1/2 C. Powdered Sugar
1 Tbsp. Fat Free Milk
1/2 Tsp. Vanilla Bean Paste (or vanilla extract... but the paste is better!)

Directions:
  • Preheat the oven to 325 degrees F. and lightly spray a doughnut pan with non-stick cooking spray.
  • Combine the first four dry ingredients (flour, sugar/sweetener, baking powder, and cinnamon) into a large bowl until well blended. Set aside.
  • In a medium bowl, whisk together the remaining wet ingredients until smooth and creamy. 
  • Add the wet ingredients in with the dry and combine until everything is fully incorporated.
  • Spoon the dough into the prepared doughnut pan, dividing evenly among the sections.
  • Place the pan into the oven and bake for 10-15 minutes, or until the doughnuts are cooked through. (The doughnuts will not turn golden brown, but should 'spring back' to the touch when done.)
  • In the mean time, whisk the ingredients for the glaze together in a small bowl and set aside.
  • Once done, remove the doughnuts from the oven and allow to cool.
  • Dip the doughnuts face-down into the glaze and set on a wire rack until set. Maybe 5 minutes or so.

Nutritional Information:
Servings: 8 • Size: 1 Doughnut • Calories: 118.6 • Fat: 1.2 g • Carbs: 23.5 g • Fiber: 2 g • Protein: 3.4 g • Sugar: 11.1 g • Sodium: 89.8 mg

Saturday, February 14, 2015

Valentine's Day Special... Oatmeal Chocolate Chip Doughettes!


Ingredients:

  • 1/3 cup almond butter
  • 2 tbsp honey
  • 1 tsp vanilla extract
  • pinch of salt
  • 1/2 cup instant oats
  • 3 tbsp mini-chocolate chips

Mix the almond butter, honey, vanilla extract and salt in a bowl. Pour in the oats and chocolate chips. Stir until everything is all mixed. Shape the mix into a giant dough ball. Cover your dough and put it in the fridge for 30 minutes. Afterwards, use a tablespoon to portion it out and roll into little mini balls. 

Enjoy!!

Friday, February 13, 2015

Valentine's Day Shake Recipes!! :D

If you are looking to shake up your shake, check these ideas out... they are literally TO DIE! All of these call for Shakeology, but you can substitute a high quality protein powder of your choice. I definitely recommend Shakeology, however, because it's nutritional value is incredible, and by far the best on the market. You don't want to feed your body junk, believe me. I've tried. It doesn't work.

Enjoy!! :)


1. Strawberry Valentine

Be mine! This strawberry smoothie is sweet and pink, just like a Valentine.

Ingredients:
1 cup almond milk
1 scoop Greenberry Shakeology (or protein powder of your choice)
1 cup fresh or frozen strawberries
½ cup ice

Place almond milk, Shakeology, strawberries, and ice in blender; cover. Blend until smooth.

2. Double Berry

This delicious smoothie has the flavor of sweet raspberries and strawberries, plus 12 grams of fiber per serving!

Ingredients:
1 cup unsweetened almond milk
1 scoop Strawberry Shakeology (or protein powder of your choice)
1 cup fresh or frozen raspberries
1 cup ice

Place almond milk, Shakeology, raspberries, and ice in blender; cover. Blend until smooth.

3. Neapolitan with Strawberries
Strawberry, Chocolate, and Vanilla Shakeology blend perfectly to taste like Neapolitan ice cream.

Ingredients:
1 cup unsweetened almond milk
1/3 scoop Strawberry Shakeology (or protein powder of your choice)
1/3 scoop Vanilla Shakeology
1/3 scoop Chocolate Shakeology
1 cup ice

Place almond milk, Shakeology, and ice in blender; cover. Blend until smooth.

4. Choco-cherry licious
Frozen black cherries are already pitted, so there’s no muss or fuss to add delicious cherry flavor in your shake! Look for unsweetened cherries to keep this smoothie healthy.

Ingredients:
1 cup unsweetened vanilla almond milk
1 scoop Chocolate Shakeology (or protein powder of your choice)
½ cup frozen unsweetened black cherries, pitted
½ cup ice

Place almond milk, Shakeology, cherries, and ice in blender; cover. Blend until smooth.

5. Strawberry Sea Salt

A little bit salty, a little bit sweet, and totally delicious.

Ingredients:
1 cup nonfat milk
1 scoop Strawberry Shakeology (or protein powder of your choice)
1 dash sea salt
1 cup ice

Place milk, Shakeology, salt, and ice in blender; cover. Blend until smooth.

6. Tirimisu

“Tiramisu” is the Italian word for “pick-me-up,” but in dessert form it’s more like  something to weigh you down. Try this tiramisu-flavored smoothie instead!

Ingredients:
1 cup brewed coffee, chilled
1 scoop Vanilla Shakeology
1 Tbsp. mascarpone cheese (or part-skim ricotta cheese)
1 tsp. unsweetened cocoa powder
½ tsp. pure rum extract
½ cup ice

Place coffee, Shakeology, cheese, cocoa powder, extract, and ice in blender; cover. Blend until smooth.